Pong from scratch or my first steps in assembly
#Coding#OsDevPong from scratch
I really did write pong from scratch using only the functions provided by the
bios. You could write the game onto an USB stick, boot from it and then play it.
My first assembly projects
At the end of the year 2015 I started learning assembly for fun. I still remember how I studied assembly and the corresponding C code during my Latin lessons at high school.
I started with translating the programming exercises from C PROGRAMMING A Modern Approach By K. N. King into assembly and some own projects, such as a little demonstration for a return address exploit or a program that prints the Finnish translation of the numbers from 0 to 99. At this point I still used the functions from the C standard library such as printf or scanf.
All the projects can be found in the repository kalehmann/x86_64_assembly_stuff on GitLab.
Going deeper
Soon after building my first simple programs for Linux, I started getting interested in writing software without using any of the functions from the C standard library or even the Linux syscall.
Of course this brings some new challenges. The bios only loads the first 512 bytes into memory. Additionally you need to do some initialization and the last two bytes should contain a boot signature, which leaves even less space for the real program.
You could either use some functions provided by the bios to load more of your program or stick to this. I haven chosen the latter.
Writing bootcode
Some people would call such software a bootloader. However, since my program does not load any additional stuff, I prefer the term bootcode.
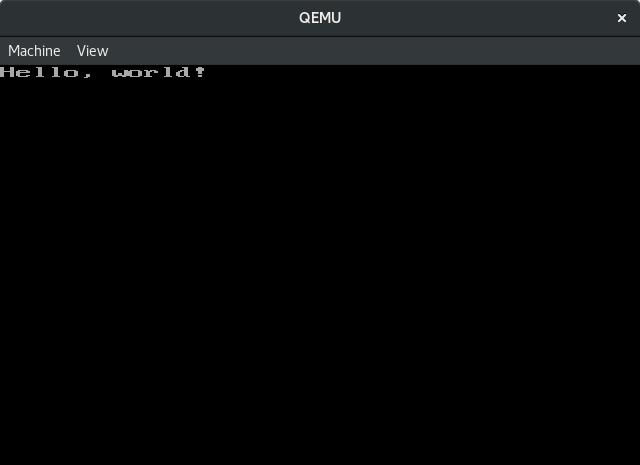
It all started simple with things like printing “Hello, world!” on the screen using the bios functions provided by the interrupt 0x10. A great resource of information about the interrupt codes of the bios is the famous interrupt list of Ralph Brown.
Such a program looks like this:
BITS 16
	mov 	ax, 07C0h
	mov 	ds, ax
	;; Set video mode 0, 40x25 B/W text
	xor 	ax,ax
	int 	10h

	mov 	si, msg_h
	;; int 10,e - teletype mode
	mov 	ah, 0eh
loop:
	;; Load byte from [ds:si] into al and increment si.
	lodsb
	int 	10h
	;; Check for end of string
	test 	al, al
	jnz	loop
	;; $ refers to the address of the beginning of the line
	;; Therefore this is an infinite loop
	jmp 	$
msg_h:	db "Hello, world!", 0
	;; Fill the rest of the file with zeros.
	times 510-($-$$) db 0
	dw 0xaa55
This file can be compiled using
nasm -f bin -o bootcode.bin bootloader.asm
and then tested with qemu using
qemu-system-i386 -fda bootloader.bin
One the I decide to write a game. With all those limits I face while writing bootcode, my decision felt to pong, because it is really simple.
Implementing the game pong
The design of the code for the game is pretty simple. First comes the initialization the stack and the setup of the video mode.
In real mode the stack has its its own register, the stack register ss. Since the stack grows downwards, the stack pointer sp and the base pointer bp have to be initialize with a high value, that the can shrink to zero.
Setting up the stack may look like this:
	;; The bootcode get loaded to 0x7C00 and is 0x200 bytes large.
	;; The stack will be right after the bootcode, at 0x7E00.
	;; The segments are 16 bytes apart. Therefore the value for the stack
	;; segment is 0x7E00 / 0x10 = 0x7E0
	mov ax, 0x7E0
	mov ss, ax
	;; Set the size of the stack to 4k
	mov sp, 4096
	mov bp, sp
The video mode is set using the interrupt 0x10,0 provided by the bios. 0x10,0 means calling the 16th interrupt of the bios with the ah register set to zero. This triggers the function for setting the video mode. The actual mode you want to set is passed in the al register. The code for setting the video mode looks like this:
	mov ah, 0
	mov al, 0x13
	int 0x10
There are several modes available, I choose the mode 0x13. That mode basically means 320x200 pixels and 256 colors. I think that hits the nail for the game.
After this follows the main loop of the game. There are several things that needs to be done in main loop:
- sleeping a short time to limit the speed of the game
- updating the position of the ball and the score when the ball hits the top or the bottom
- handling the user input and updating the positions of the two players
- redrawing the screen
Sleeping
Fortunately the bios provides for sleeping a short time, the interrupt 0x10,0x86 - wait for a given period. The period to wait is passed in dx:cx in microseconds.
For example if the game should run at 30 frames per second, the waiting period should be a 30th of a second - 33333 microseconds. The code would look like this:
	mov ah, 86h
	mov cx, 0
	mov dx, 33333
	int 15h
Handling user input
Of course the bios also provides functionality to get keyboard input. The interrupt 0x16,1 can be used to check if there is a keystroke in the keyboard buffer and 0x16,0 gets that keystroke and removes it from the keyboard buffer.
The interrupt 0x16,1 sets the zero flag if no keystroke is available. When a keystroke is available, the interrupt 0x16,0 returns the bios scancode in ah and the ascii character in al.
This code checks if the left arrow key has been pressed:
	mov ah, 1
	int 0x16
	jz handle_input_done

	mov ah, 0
	int 0x16
	cmp ah, 0x4b
	je arrow_left_pressed
Draw everything on the screen
The screen can be set all black using the set video mode code shown earlier. Drawing a rectangle on the screen is a bit trickier.
One way would be using the interrupt 0x10,0xc to set every single pixel. This interrupt takes the following arguments:
- the color of the pixel in al
- the number of the page to draw the pixel on in bh
- the x position of the pixel on the screen in cx
- the y position of the pixel on the screen in dx
A function for drawing a rectangle on the screen using this interrupt looks like this:
;; This function draws a rectangle on the screen
;; It takes the following arguments
;; - the color in al
;; - the x position in bx
;; - the y position in cx
;; - the width in dx
;; - the height in si
draw_rectangle:
	push bp

	mov bp, bx
	add si, cx
	mov di, bx
	add di, dx
	mov ah, 0xc
	xor bh, bh

	mov dx, cx
.row_loop:
	mov cx, bp
	cmp dx, si
	je .done

.column_loop:
	int 0x10
	inc cx
	cmp cx, di
	jb .column_loop
	inc dx
	jmp .row_loop

.done:
	pop bp
	ret
The alternative is writing directly into the video memory. The video memory is mapped to the RAM beginning at the address 0xA0000. In the video mode 0x13 the screen is mapped line wise into the video memory with one byte per pixel. The value of the byte determines the color of the pixel.
A function for drawing a rectangle directly into the video memory looks like this:
;; This function draws a rectangle on the screen
;; It takes the following arguments
;; - the x position in bx
;; - the y position in cx
;; - the width in dx
;; - the height in si
;; - the color in al
draw_rectangle:
	push bp
	mov bp, sp
	sub sp, 8

	mov [bp-6], al
	mov [bp-4], dx
	mov [bp-2], si

	;; Calculate the offset of the next line
	mov ax, 320
	sub ax, dx
	mov [bp-8], ax

	mov ax, 320
	mul cx
	add ax, bx
	;; Save the offset of the first pixel
	mov si, ax

	;; Prepare the extra segment for writing into the video
	;; memory.
	mov dx, 0xA000
	mov es, dx

	mov al, [bp-6]
	mov cx, [bp-2]
.row_loop:
	mov bx, [bp-4]
.col_loop:
	mov [es:si], al
	inc si
	dec bx
	jnz .col_loop
	add si, [bp-8]
	loop .row_loop

	add sp, 8
	pop bp
	ret
Printing on the screen
The scores of the two players gets printed on the screen during the game. To save memory, the score is not printed numeric. After 9 come the characters from a to z.
Printing on the screen can be done using the interrupt 0x10,0xe as already shown in the first example.
Putting it all together
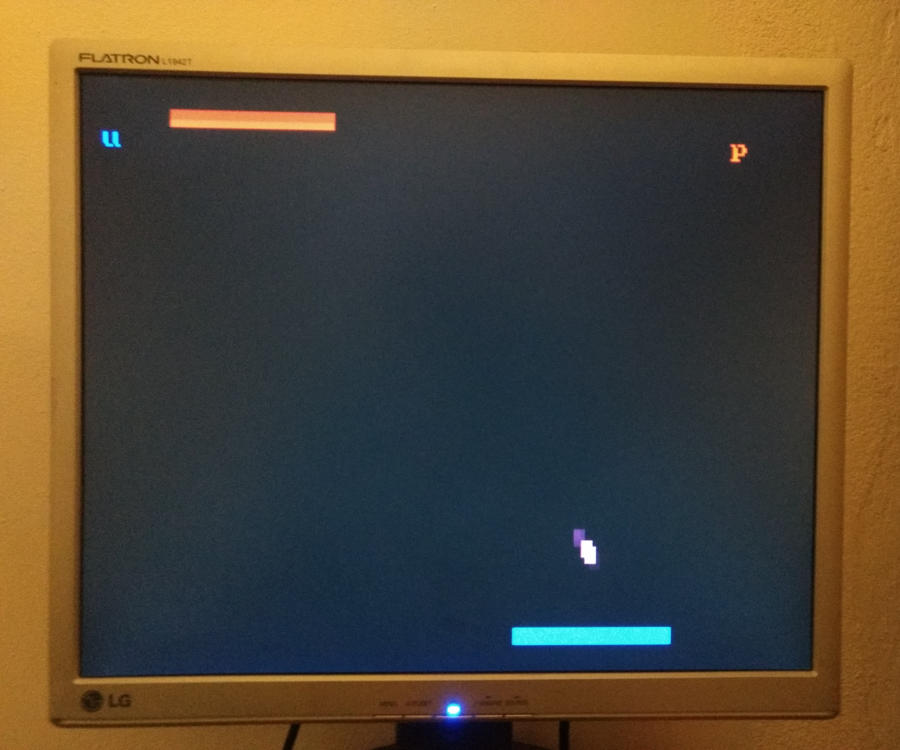
With all this combined, the game pong can be implemented:
The game flickers a little bit. This brought me to nearly vomit at one point during the developing process.
The whole source of the game can been seen at the GitLab repository kalehmann/pong.
Note that the game can be run on real hardware, it may not always succeed. Some BIOS require a valid Bios Parameter Block, but pong does not have one as it takes too much memory.