Remote unlocking of an encrypted private Arch Linux server
#Coding#HomelabMy Homelab includes a private Arch Linux server, private as in the server is connected to the internet, but not reachable under a public IP address. The hard drive of this server is encrypted. As this server does not have a keyboard or monitor attached, I need a way to unlock the hard drive remotely during the boot process. Setting up a SSH daemon in the early userspace to unlock the drive remotely is already well documented. By following these instructions I am able to unlock my private server from a device in the same LAN. However this is not sufficient for my needs.
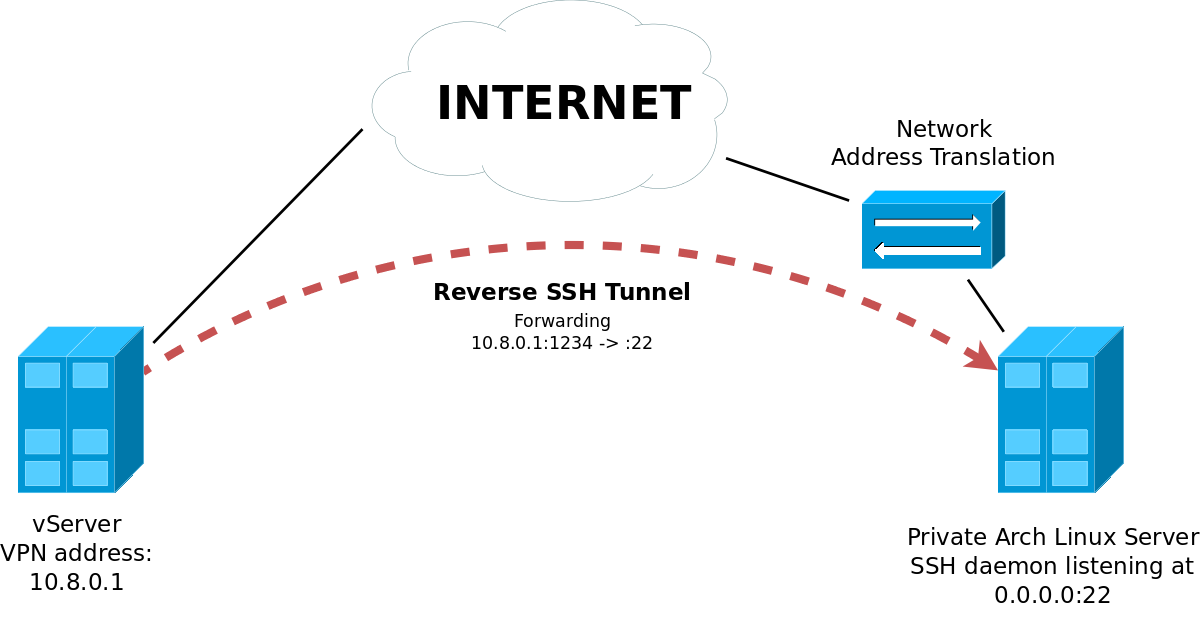
If the server restarts after an unexpected power outage, I want to be able to unlock it from anywhere in the world. The same goes for updates. I want to be able to update and restart the server while I am abroad. Fortunately I also got a virtual server with a public IPv4 address. This post evaluates how to use that public server as a proxy to gain access to the early userspace of the private server.
My GigaByte Brix as home server
First start with the hardware. I got a GigaByte BRIX GB-BLCE-4105. While it is no server hardware, it meets all my requirements and is cheap and quiet.
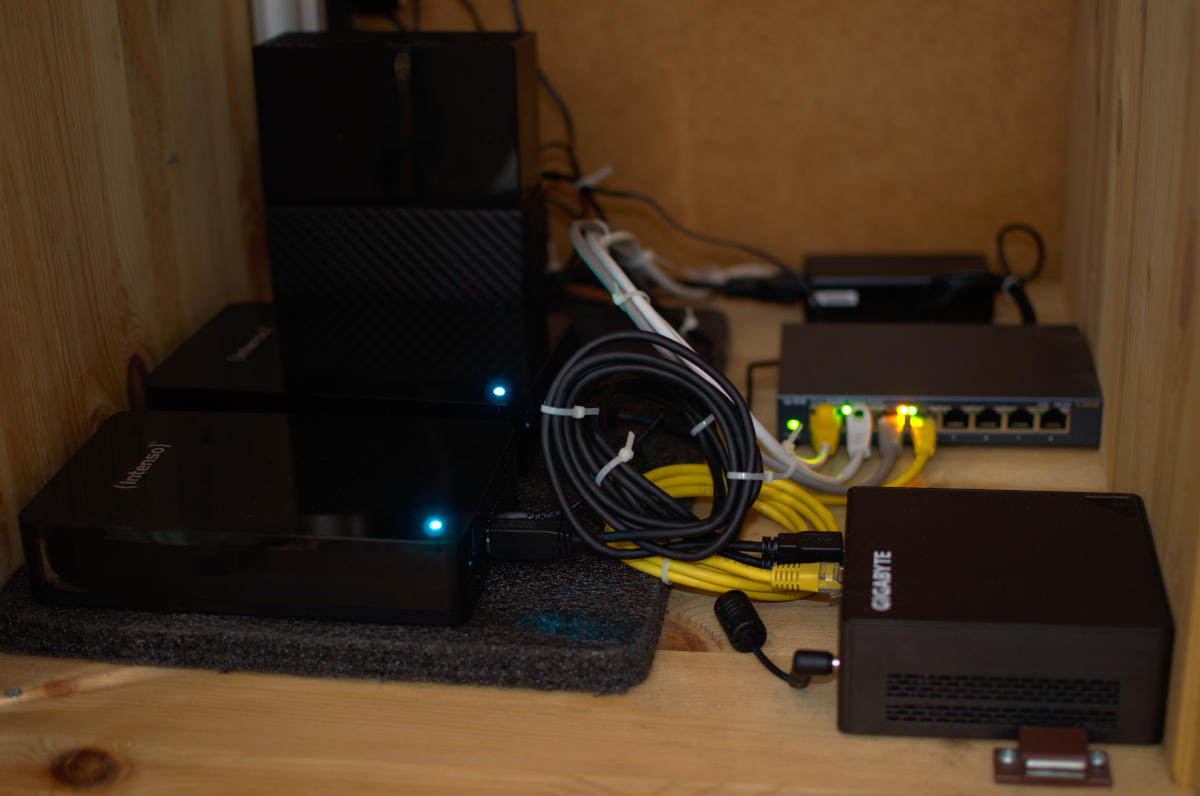
I use it to play around with a few virtual machines, manage all my data and run some services for my hobby projects, such as Gitea and Drone. As of now I occupy a single room in a shared apartment. Since I have no separate place for the server. Therefore I keep it in my wardrobe to let it not annoy me with the sound of the hard drives or the light of the power LEDs.
Access the early userspace from anywhere
The first step to make the early userspace of an Arch Linux system is to start a SSH daemon in the early userspace. The Arch Linux Wiki already documents detailed how to setup a SSH daemon in the early userspace, there is no need to write any more on that.
Great - now one can SSH into the early userspace of an Arch System. For my Homelab, I am now able to unlock the server from inside my home network. Now I want to go a step further and access the early userspace from anywhere.
For achieving this I considered three different options:
- Exposing the SSH daemon running in the early userspace of my private Arch
Linux server via port forwarding on the Router in my home network.
This approach comes with a bunch of downsides:
- My router at home needs a public IP address. carrier-grade NAT is becoming more widespread here in Germany to fight the IPv4 address exhaustion.
- If my router at home has a public IP address, it may change and I always need to know its current address. This downside can be mitigated using Dynamic DNS.
- I need to have administrative access to my router at home. In a shared apartment this may not always be the case.
-
Installing OpenVPN on the public server and connect to the VPN from the early userspace of the private server. If I want to unlock the drive from a remote location I only need to login into the VPN and then have access to the SSH server running inside the early userspace of the private Arch Linux server. As a downside of this approach, I have to bring OpenVPN inside the early userspace of Arch Linux.
- Creating a reverse SSH tunnel aka remote port forwarding from my private Arch Linux server in my Homelab to my public virtual server to expose the SSH daemon running inside the early userspace of the Arch Linux server.
After thoroughly considering these three approaches, I decided to implement a combination of the second and third approach. I will install OpenVPN on my public server and expose the SSH daemon running in the early userspace of the Arch Linux server in my Homelab inside the VPN via a reverse SSH tunnel.
Setup a reverse SSH tunnel in the early userspace
The SSH daemon in the early userspace of the private server and the OpenVPN on
the public server are already setup using the instructions available in the
Arch Linux wiki.
Inside the VPN the public server has the address 10.8.0.1.
In the next step, all traffic from 10.8.0.1:1234 on the public server should
be forwarded to the SSH daemon listening on port 22 inside the early userspace
of the private server.
What is needed for this?
- The address of the public server
- An user on the public server for the ssh tunnel
- A SSH client inside the early userspace of the private server.
- A SSH key pair for the connection to the public server.
- The fingerprint of the public servers key.
My public server already has a static IP and multiple domains resolving to it,
so I do not need to bother about this.
For the setup of the SSH tunnel I created a new user on the public server,
without any ability to login or start a shell. The users name is janus, as the
Roman god of gates and doorways and it is created with:
adduser --gecos "" --home /home/janus --disabled-login --shell /bin/false janus
Next /etc/ssh/sshd_config on the public server needs to be modified.
To allow clients the binding of ports the following directive needs to be added:
GatewayPorts clientspecified
I use dropbear as SSH daemon in the early userspace, setup using the
mkinitcpio-dropbear package.
This package also provides dropbear as SSH client capable of initiating a
reverse tunnel.
Generate a key pair for dropbear
Now a key pair for the connection from the private to the public server needs to be created:
dropbearkey -t ras -f /root/.ssh/tunnel_key
dropbearkey -y -f /root/.ssh/tunnel_key | grep ^ssh-rsa > /root/.ssh/tunnel_key
Now the tunnel can be established with:
dbclient \
  -N
  -i /root/.ssh/tunnel_key  \
  -R 10.8.0.1:1234:127.0.0.1:22
  janus@<server ip>
Upon using this command the first time, one will be asked to confirm the
fingerprint of the servers key.
That will add the keys fingerprint to ~/.ssh/authorized_keys.
Putting it all together
After analyzing all requirements, a mkinitcpio hook can be created that puts everything mentioned before together. A mkinitcpio hook consists of two parts:
- The build hook. Build hooks are invoked by mkinitcpio and add files to the
initial ramdisk image.
The build hook should add the key pair for the connection to the public server
to
/root/.sshinside the initial ramdisk as well as the fingerprint of the public servers key to/root/.ssh/knwon_hosts. Last but not least the build hooks adds the runtime hook to the image. - The runtime hook. The sole purpose of the runtime hooks is to establish the reverse SSH tunnel forwarding connections from the public to the private server.
Since the hook needs to be aware for many variables different for each user - such as the address of the remote server, the user on the remote server or the location of the key pair - I created a build script for the hook inside the repository kalehmann/arch-remote-unlock-hooks.
The syntax is loosely orientated on automake.
First one has to call ./configure provide all required parameters either as
environment variables or parameters to the script.
A list of all available parameters and environment variables can be obtained
either by calling
./configure --help
or reading the Readme file of the project.
The configure script creates a Makefile for the hook.
Now the install and run scripts for the hook can be build with make and
installed to the mkinitcpio configuration directory with make install.
Finally the initial ramdisk images needs to be recreated and installed with
mkinitcpio -p linux